

Organise + design your Reno with these resources
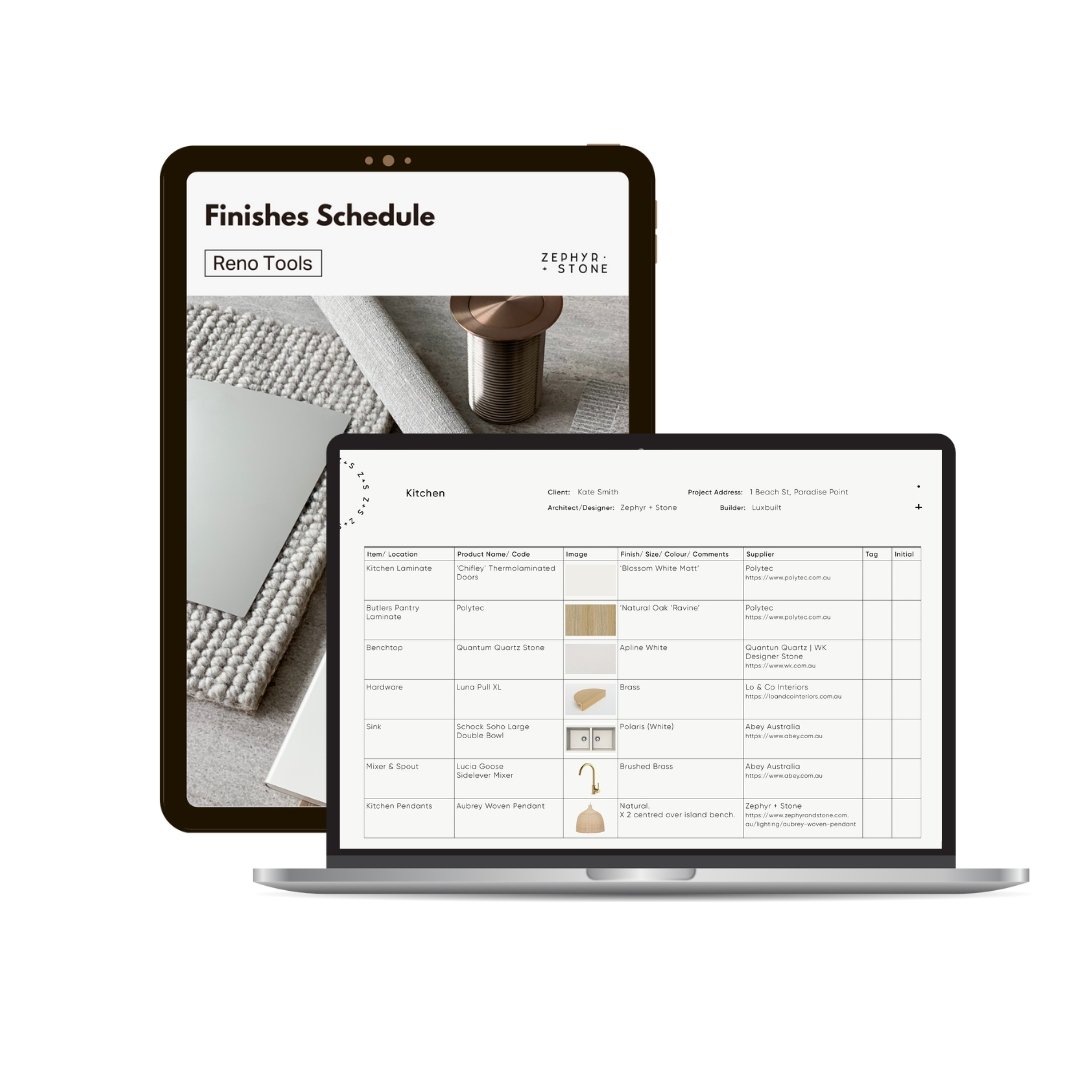
The Finishes Schedule is a template for keeping every product, fixture, finish and colour in your renovation or build in one place. Fill it in as you design and plan, then share it with your builder, trades and architect, so everyone is working from the same details and nothing gets missed.
What you can store in it
Product names and codes
Brand names
Colours, including material and paint colours
Sizes, including length and width
Supplier and manufacturer details, including websites and contact details
Comments, installation notes and details for your trades
Images of each product, so your building team can see what you've chosen
How you'll use it
Use it for one room or a whole new home, from a kitchen or bathroom to a laundry renovation.
Keep it on your computer, phone or tablet, so you can check a product or code on a site visit or at the hardware shop. Share it with your team or print it for site.
Keep it after the job is finished too. When you need a paint touch-up years from now, the colour is right there.
A Prompt Sheet is included, so you know exactly what products to list.
What you'll need
The template is used in the free version of Canva, and you can reuse it for your next project.
Common questions
What is a finishes schedule?
It's one document that lists every product and finish going into your project, with the codes, colours, sizes and supplier details your builder and trades need. It's also called an FF&E schedule, a specifications schedule, a schedule of finishes or a finish schedule.
Do I need to pay for Canva?
No. The template is used in the free version of Canva.
Can I use it for one room?
Yes. It works for one room or a whole new home, and you can reuse it for the next project.
How do I share it with my builder?
Share it digitally with your builder, trades or architect, or print it for handy reference on site.
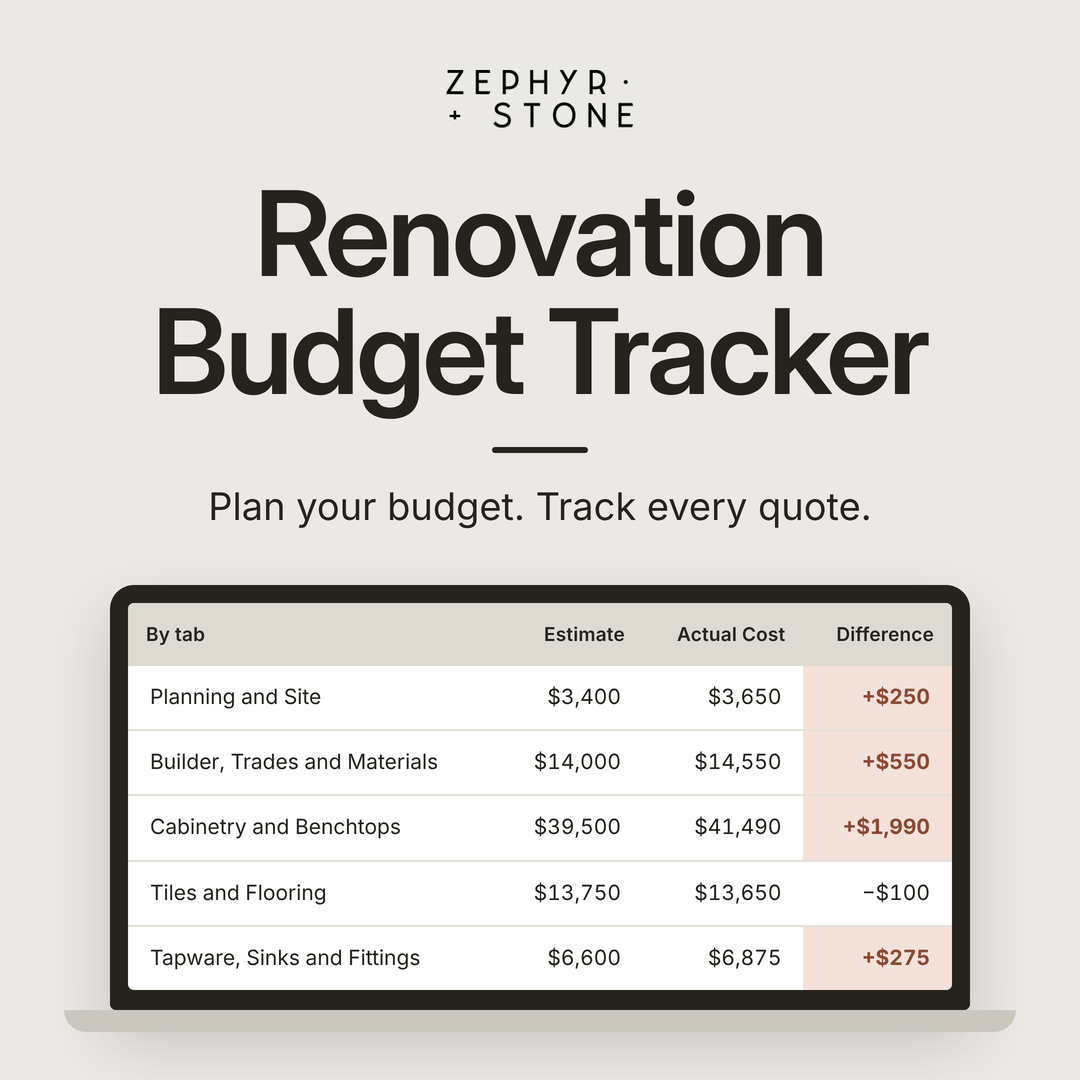
A renovation budget template and cost calculator, pre-loaded with over 200 items. Plan your budget, then track real costs as quotes come in.
Over 200 items already listed, in 10 categories
Estimate vs actual side by side, with overspends shown in red
Totals by room, by section and for the whole job
Your contingency added at the percentage you choose
What’s inside
You're never starting from a blank page. The items are grouped into 10 categories, each one a part of your renovation:
Planning and Site: design, approvals, demolition, skip bins and equipment hire
Builder, Trades and Materials
Cabinetry and Benchtops
Tiles and Flooring
Tapware, Sinks and Fittings
Electrical and Appliances
Windows, Doors and Blinds
Outdoor
Furniture
Other Costs
How it works
Every item has a place for your estimate while you plan, and your actual cost once you have a quote in writing or have paid. If the actual cost is higher than your estimate, it shows in red, so you see it the day the quote lands, not when the money's gone.
If a builder is quoting the whole job, their total goes in as one line, and you only add what isn't in their quote, like your appliances or furniture. Items you don't need stay empty.
Short notes beside some items point out the costs that are easy to forget.
A summary page adds it all up for you, by section, by room and in total, with your estimate and your actual cost side by side. Each item can be given a room, like the kitchen or ensuite, so you see what each room is costing you. Your contingency, the money you set aside for surprises, is added to your total at the percentage you choose. All amounts are entered including GST.
Who it’s for
The tracker works for homeowners renovating or building, whether you're working with a builder or managing the trades yourself.
It's built for you if:
You don't know what your project will actually cost.
You've started planning, and costs feel like they're getting out of control.
You're juggling quotes and need one place to track everything.
I built this tracker for my own renovations and developments, and I've used it to keep every one of them on budget for around 20 years.
For typical figures, here’s what a renovation costs in Australia, and what to set aside in your renovation budget.
What you need
It works best in Excel on a computer. It also opens in Google Sheets and Apple Numbers, but some features may not work the same way.
Questions
Is this a renovation cost calculator?
Yes, in the sense that it adds up your costs for you. You enter your estimates and quotes, and it calculates your totals by section, by room and for the whole job, including your contingency. It doesn't guess your costs for you, so for typical figures, start with what a renovation costs in Australia.
Does it work for a bathroom or kitchen renovation on its own?
Yes. Items you don't need stay empty, and each item can be given a room, so you can use it for one room or a whole home.
What if my builder is quoting the whole job?
Put their total in as one line, then add only what isn't in their quote, like your appliances or furniture.
What program do I need?
It works best in Excel on a computer. It also opens in Google Sheets and Apple Numbers, but some features may not work the same way.
Do the amounts include GST?
Yes. All amounts are entered including GST.
We love to create a statement with feature door handles as much as the next person. We're only human!
But equally as often we like to keep things minimal and understated with handleless cabinetry, ideally without blowing out our whole kitchen budget in the process!
How you ask? Step in the humble and often unsung cabinetry hero - the Push to Open for hinges.
What’s A Push To Open?
If you’ve been researching cabinetry for your home, you’d have seen or heard of handleless drawers and cabinets, often referred to as ‘finger pull’ cabinetry. But these can be costly to install throughout your home and aren’t necessarily a practical solution for some spaces.
Quite often, a push catch like the Hettich Push to Open for hinges can be equally if not more practical and far more seamless. This is because the push catch sits snugly within your cabinetry and opens when pressure is applied at its position.

Zephyr and Stone • Contemporary Coastal Study Nook with push catches for cupboards

Zephyr and Stone • Contemporary Coastal Walk In Robe
Where Can You Install Them?
Push catches can be installed within cabinetry throughout your home - kitchen cupboards and overheads, storage and linen cupboards, laundry cabinets, wardrobes closets - you name it.
They are especially perfect for integrated cabinetry like TV units or built-in desks, as they allow you to create the look of custom, bespoke cabinetry by eliminating the need for handles.
Where Shouldn’t You Install Them?
Pushing on the door at the catch location causes it to open. It’s therefore best to avoid installing push catches on cabinetry where you’ll be regularly leaning against the door, as the door opens from the pressure applied when leaning against it.
Avoid push catches in front of a basin, cooktop or sink, or any work surface where you’ll be standing regularly to perform tasks.

Zephyr and Stone • Beach House Study Nook

Zephyr and Stone • Classic Coastal Project Butlers Pantry
Timeless Design
If there’s one thing that’s inevitable when it comes to home design, it’s that trends and products fall in and out of fashion…and door handles are no exception.
Installing Push to Open mechanisms ensures the longevity of your design and provides a minimal, uncluttered aesthetic that will outlast trends. Our favourite place to install push catches is in overhead kitchen cupboards, for a timeless and refined statement.
So there you have it, minimal, understated and refined. Hettich Push to Open for hinges are the ideal solution for creating timeless cabinetry throughout your home, whilst keeping your cabinetry on budget.